

2 Creating Forms
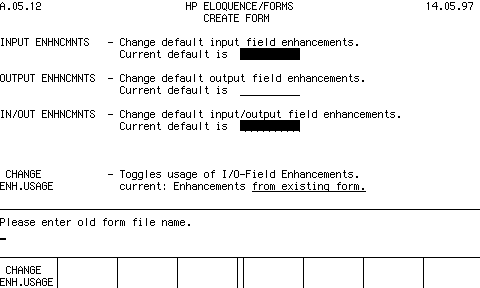
CREATE FROM FORM -- Allows you to specify a form file name that already exists. (The file name may contain a device specifier or a volume label). The old form can be used as a basis for the new form. The old form will be displayed and a new menu will be set.
CREATE NEW FORM -- Clears the display so you can create a completely new form. (Refer to the main forms-definition menu in page 17 .)

CHANGE ENH. USAGE -- Allows you to select the I/O-field enhancements from two sources:

IN/OUTPUT FIELDS -- Defines the location and length of input and output fields.
INPUT ORDER -- Specifies the order in which the program reads the input fields.
TAB ORDER -- Sets the order in which the user accesses each input field.
OUTPUT ORDER -- Specifies the order in which the program accesses each output field.
LAYOUT FUNCTIONS -- Used with the keyboard, it allows you to draw images (which are not fields) on the screen and use line-draw characters.
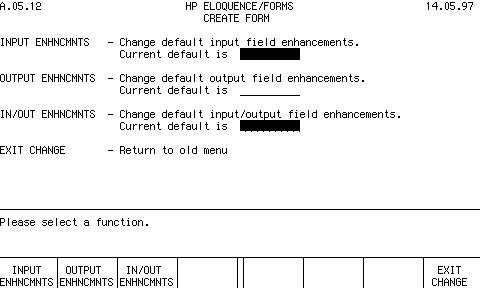
CHANGE DEFAULT -- Allows you to change the current set of default enhancements. See the sub-section titled page 19 .
STORE FORM -- Stores the form on a disk. The file name specified can be a maximum of nine characters. The extension .FORM is automatically appended to the specified file name.
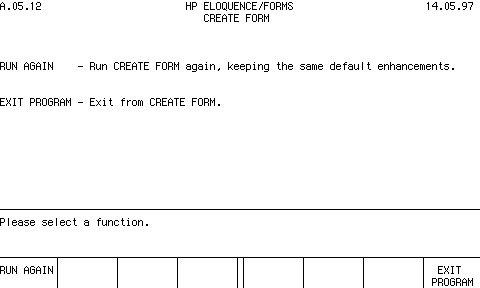
RESTART -- Generates screen below.


The default enhancements of input fields, output fields and input/output fields are changed by pressing the INPUT ENHNCMNTS, OUTPUT ENHNCMNTS or IN/OUT ENHNCMNTS softkeys respectively. This action takes you into the display enhancement selection screen. You can then proceed as described in the section titled page 15 (earlier in this section).

INPUT FIELD -- Defines an area (a field) that can only be used for input. You can define a maximum of 200 input fields for each form. To define an input field, position the cursor at the first character position and press INPUT FIELD. If the field is to be ten characters long, for example, press this softkey ten times. The input field enhancements and fill character are added automatically. (You defined the field enhancements and fill character before creating the form image.) A line may contain multiple input fields; however, input fields on the same line must be separated by at least one non-input field character.
OUTPUT FIELD -- Defines a field that can only be used for output. You can define a maximum of 200 output fields. Define each output field in the same manner as an input field.
IN/OUT FIELD -- Defines a field that can be used for either input or output. Define each input/output field in the same manner as an input field or output field. Input/output fields must be separated from both input and output fields by at least one non-field character.
DELETE INPUT -- To delete a field previously defined as an input field, you position the cursor on the left of the field to be deleted and press DELETE INPUT. If the field is an input/output field, only the input portion is deleted. That is, the input/output field becomes an output-only field. You delete everything to the right of the cursor, so you can use this facility to shorten field.
DELETE OUTPUT -- Performs the same function as the DELETE INPUT softkey, and in the same way, except DELETE OUTPUT works on output fields.
MOVE INPUT -- Moves an input field from one area of the form to another. First, position the cursor within the input field and press MOVE INPUT. A new menu appears:

Move the cursor to the location where the first character of the field is to be. Then press NEW LOCATION. The input field will be moved to the new location. The length of the field does not change. If the relocation is accomplished, with no errors, an EXIT is performed automatically. If the new location of the field would cause an overlap with another field or if the field would extend beyond the right side of the display, the relocation will not take place. If you decide not to move the field, press EXIT to return to the previous menu.
MOVE OUTPUT -- Allows you to move an output field in the same manner as moving an input field.
You can create, delete and move as many fields in the form as you wish. When you are satisfied with the number, length and location of the fields, press EXIT.
KEYBOARD -- You should only use the softkey sets when you are creating and manipulating forms. If you use the keys on the keyboard, especially such keys as "Delete line", "Insert line", "Delete char", and "Insert char", you might get some unexpected results; your orders may be muddled and incoherent.
To specify a different input order, press the INPUT ORDER softkey. The form fields are redrawn with the input-field numbers in the input fields. The output fields are not shown.
To specify a different tab order, press the TAB ORDER softkey. The form fields are redrawn with the tab field-numbers in the input fields. The output fields are not shown.
To specify a different output order, press the OUTPUT ORDER softkey. The form fields are redrawn with the output-field numbers in the output fields. The input fields are not shown.
You can always see which order you are currently manipulating, since it is indicated in the EXIT softkey.
There is a softkey menu for each of the order (input, tab, and output). Here is an example of the input order:

CLEAR field #s -- Clears all the field numbers from the form.
VALIDATE field #s -- Takes the numbers currently in the fields and verifies that they represent a correct sequence of order numbers. The sequence of numbers will be corrected if necessary. If bad numbers, such as "ABC" or "12.3.34", are given, no such correction will take place. (Refer to page 23 for more details on numbering.) This softkey only validates numbers on the screen, it will not set the order numbers. If you want to store the form later with exactly these order numbers, use the SET new order softkey).
ENTER this fld# -- Allows you to type in a number for a field, regardless of the size of the field. A $ sign is displayed in a field if the number requires more space than is available in this field. Position the cursor in the field to which you wish to assign a number. Press this softkey, and the prompt ENTER ORDER NO: ____________ ...will be temporarily inserted in a line above the field. The relevant field will be marked "#". Type in the new number and press RETURN. If the field is too small to display the entire number, a $ sign will be placed in that filed, showing that a number has been assigned to that field.
EXPAND this $ -- This softkey allows you to view the $ numbers on the screen. A $ sign is visible in any field whose order number is too large to be displayed in that field. To view the number, position the cursor in the relevant field and press EXPAND this $. The number will be displayed in the lower part of the softkey on the screen.
TAB->INPT field #s -- This softkey is only available when you are defining the input order. It will change the setting of the input order to be the same as the tab order, providing you with a frequently-used input convention in the form of a softkey.
INPT->TAB field #s -- This softkey is only available when you are defining the tab order. It will change the setting of the tab order to be the same as the input order.
SHOW old order -- This softkey displays the order which is currently SET. It may be different from the order displayed before you pressed this softkey. Use this softkey to view the original order after you have made some changes, but before you have made these changes permanent by pressing the SET new order softkey.
SET new order -- When you press this softkey, the system first of all validates the numbers in the fields (see VALIDATE for more details). The resulting order after the system validation is complete now becomes the valid order. Note that when you STORE a form, the order is only changed if you press the SET new order softkey first. You can re-examine the current valid order by pressing the softkey SHOW old order.
EXIT order -- This softkey returns you to the previous menu.
KEYBOARD -- You use the keyboard to directly type in the relevant numbers in the fields, except for those fields which are too small to display that number. Use the ENTER this fld# softkey to input numbers which are too long for the respective field. You must not type the $ sign in a field from the keyboard.
INVERSE HERE, BLINKING HERE, UNDERLINE HERE and HALF BRGHT HERE -- Change the character accordingly at the current cursor position. For example, if you want to emphasize the form's title by using inverse video, position the cursor at the first character of the title and press the softkey INVERSE HERE several times until all the characters are highlighted.
LINE DRAW ENHANCMT -- When you press this softkey, a new set of softkeys appears, as shown here:

These keys allow you to specify the enhancements for line-draw characters only. The current status of the enhancement (on or off) is displayed in the lower part of the softkey on the screen. The EXIT softkey returns you to the layout softkeys.
LINE DRAW CHARACTRS -- When you press this softkey, you gain access to the line-draw-character softkeys, as shown here:

The line-draw characters provided are common to the HP 700/92. The MORE CHARACTER softkey allows you to cycle through five sets of characters. The ADVANCE softkey selects one of the four line-draw characters within the line-draw softkeys. The selected character is displayed in the lower part of the line-draw-enhancement softkeys at the bottom of the screen. The EXIT softkey returns you to the layout softkey menu.
EXIT LAYOUT -- Pressing this softkey returns you to the previous menu.
KEYBOARD -- You use the keyboard to type in labels, descriptions, the name (title) of the form, in between the fields, but not in the fields themselves. Remember that you must not use the "Delete line", "Insert line", "Delete char", or the "Insert char" keys to create or modify forms, since these keys might produce unexpected results; your orders may be muddled and incoherent.